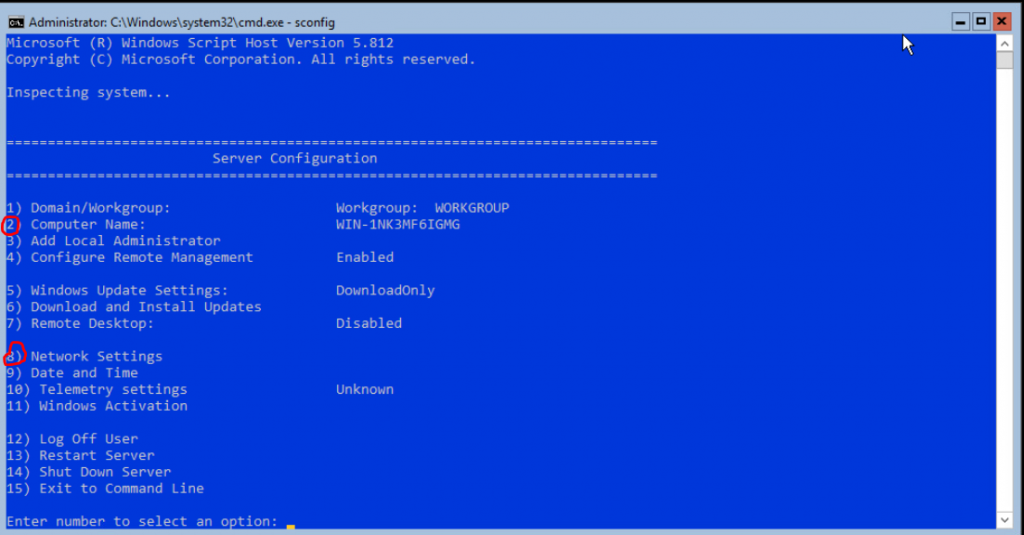
We had an issue where we had turned on fractional reserve using ontap 9.6 then upgraded to 9.9. It appears the new GUI does not display if fractional reserve is enabled or not. I believe from Ontap version 9.7 and below you cannot switch back to the classic view so to the command prompt we go!
To find this via the CLI use the following command:
Cluster1::> vol show -vserver svm01 -fields fractional-reserve
Errors: Failed to update disk partitions for /vmfs/devices/disks/naa.600a09803831462f715d52596146475
Resolution:
I have actually seen this before. The problem is an MTU issue. In our case the VPC in the network didnt have the correct MTU so once fixed that worked. If you see this error then you might want to check the MTU throughout your infrastructure (eg DVS, VMKernels etc)
When attempting to install Rocky Linux 8 on an ESXi 7.0 host the boot iso (minimal) was not being picked up at all and I was just getting the Attempting to start up from message.
Solution
To fix the issue disable Secure Boot option then try again. It appears secure boot is not supported yet.
The default timeout for SSH on NSX-T Manager is 10 minutes (600 seconds). This is rather annoying when you need to make a cup of tea and come back and all your sessions have disappeared.
To remove the SSH timeout connect to the NSX Manager via the admin account using SSH.
nsx01> set cli-timeout 0
You can set it to the value (in seconds) of your choice if you prefer to keep some form of timeout
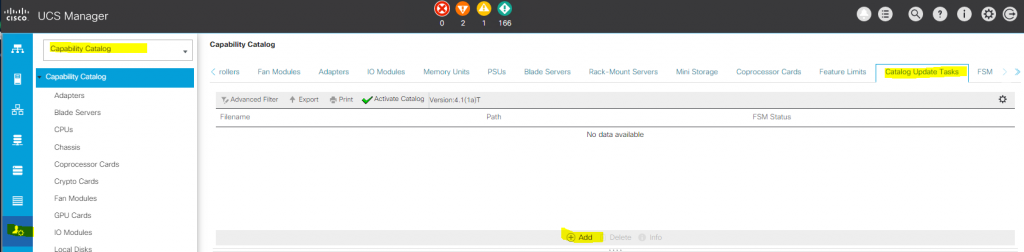
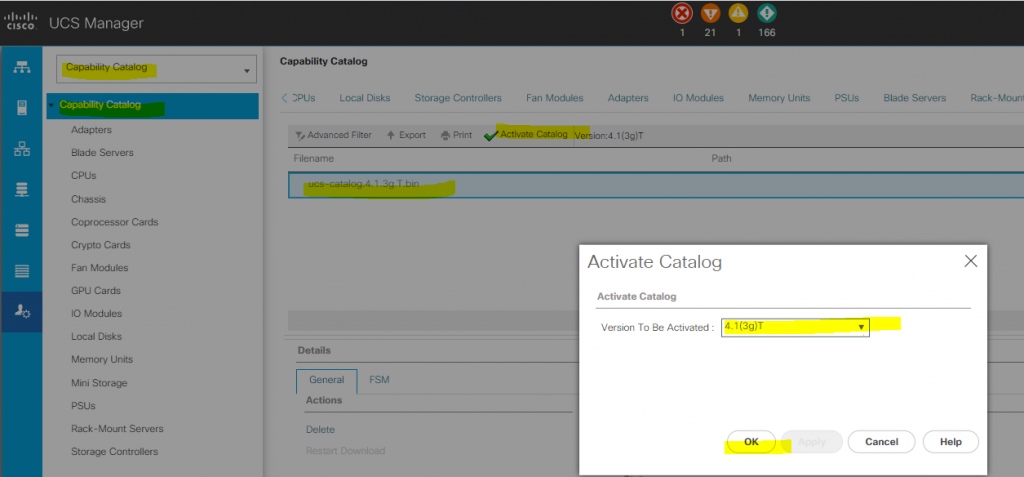
The Capability Catalog version is determined by the version of Cisco UCS that you are using. For example, Cisco UCS 4.1 releases work with any 4.1 release of the Capability Catalog, but not with 4.0 releases of the Capability Catalog.
Admin button on left -> Capability Catalog -> Catalog Update Tasks -> Upload new catalog -> Ok
Admin -> Capability Catalog -> Activate Catalog -> Drop down to new catalog firmware (4.1.(3g)T in my case)
Equipment -> Select Blade -> Server Maintenance -> Re-acknowledge
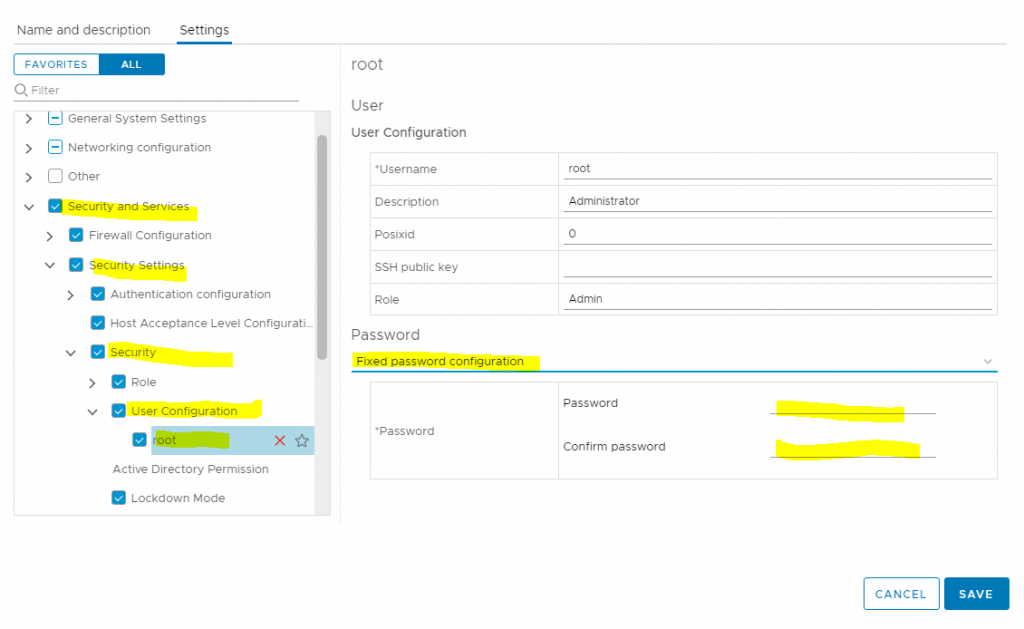
By default, when using Auto Deploy the password will be blank. In order to change this behaviour edit the host profile to be Fixed password Configuration
I was tasked with auto deploying around 100 Ciscso UCS blades with stateful ESXi 7.0 on SD cards with as little touch as possible for a new environment
There are various ways of doing this but it was decided that the service profile name in UCS would need to match the ESXI host. This means we’d need to match the MAC Address of the primary vNIC to a DHCP reservation. Reverse and forward DNS lookups would also need to be in place before booting. Here are the steps to achieve this:
On the Cisco UCS FIs
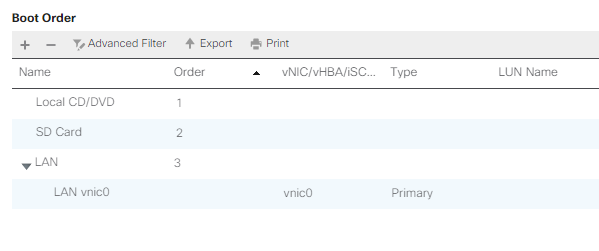
Change Boot order in the service Profile to be the following:
In our case we booted using vNic0 which includes the ESXi Management network
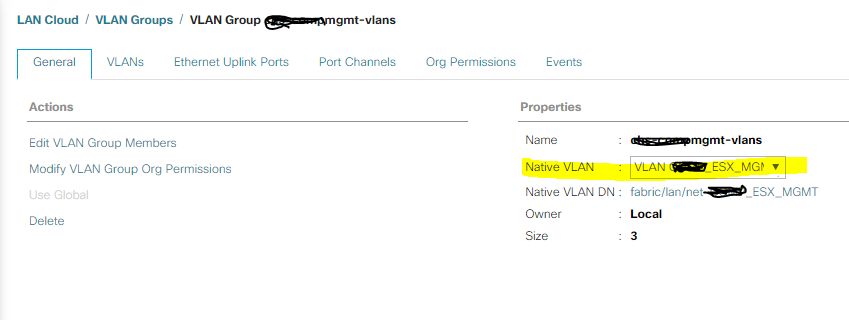
As mentioned above we are going to boot and assign the management network IP address directly. We can do this by assigning the ESXi Management as the native VLAN in the Service Profile. In this case I used vlan groups so I just needed to make the change here:
As we are using Native Vlans we don’t need to put the VLAN in the management IP configuration as the UCS deals with this. You may not be able to do this if you setup and may require a different PXE boot network.
DHCP and DNS
This was semi-automated at build time and I’ll be writing a script to add DNS and DHCP reservations for future deployments. Essentially the pseudo code for this would be
Create Service Profile from Template
Get MAC Address of vNic0
Add DHCP reservation in Windows 2019 DHCP server
Add reverse and forward DNS entries in Windows 2019 DNS server
VMware
This was the trickiest part as Host Profiles are pretty flaky at the best of times. I wont go over the auto deploy configuration as that is well documented.
We built a reference host manually then exported the host profile config. All our Vmks will be getting DHCP so we needed to put IP-Helpers in beforehand.
Once the reference host was built we needed to tweak the host profile with the following:
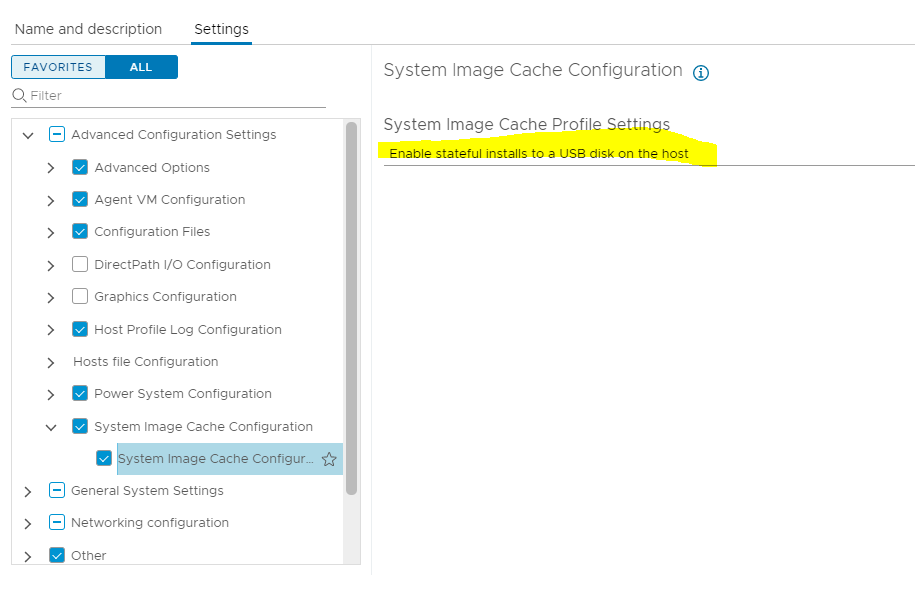
Change Cache Profile settings
This was a bit of a gotcha as the host ESXi host actually sees the FlexFlash SD card as a USB drive. This needs to be changed to “Enable stateful install to a USB disk on this host”
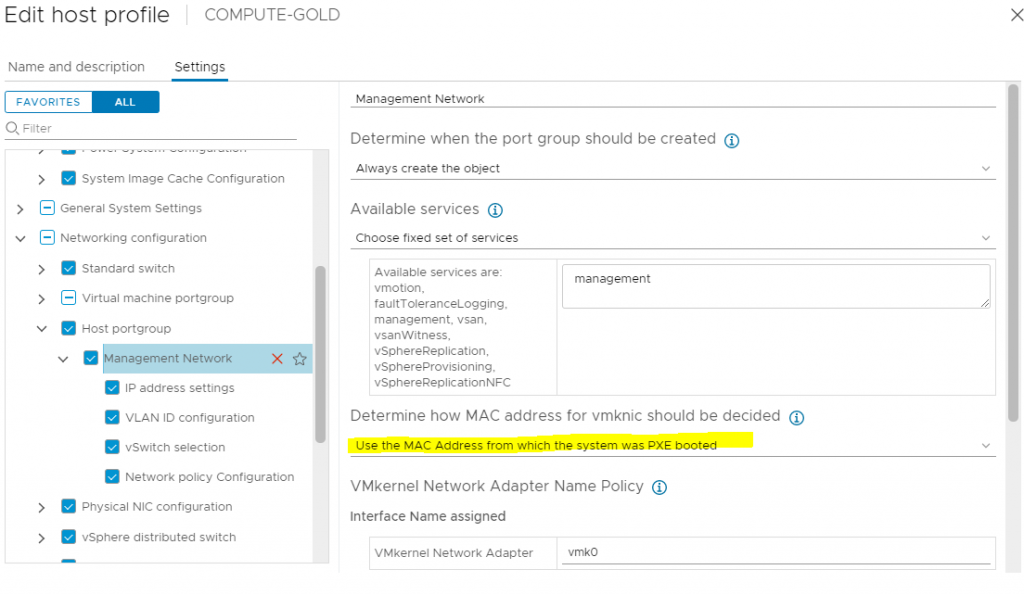
Set the management interface to have the physical NIC MAC address
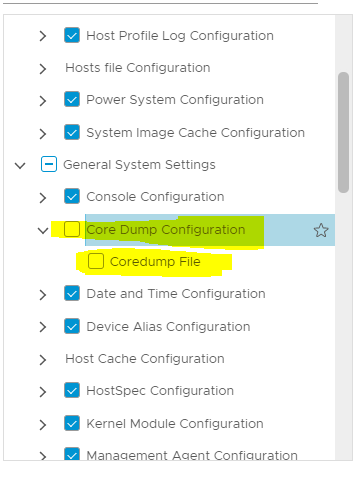
Remove Core Dumps
Host Profiles failed to apply unless this was disabled due to having no storage configured
Set root Password
One thing I did notice is if you make any alterations, it is better to update the reference host and extract the host profile again – rather than editing the host profile.
Miscellaneous
The iSCSI IQN name was an issue for us. As our target storage (Netapp) doesn’t accept wildcards we needed to make the IQN the name of the host . This IQN needs to be prepopulated in the Initiator Groups in Ontap. To get around this and remove the extra text from the initiator I used the following shell script and added it to the Script Bundle when auto deploy
#!/bin/sh

ESXHOST=`hostname | cut -d"." -f1`

esxcli iscsi adapter set -A vmhba64 -n iqn.1998-01.com.vmware:$ESXHOST
Note: Despite this applying correctly during host profile configuration the host required an extra manual reboot after completion.
Scratch partitions are also an issue with using SD Cards and stateful installs. We required a post-install script to update these as well.
Summary
All in all the time to deployment of the hosts will is quicker but Auto Deploy still falls down a bit and I’d be looking to use something like Ansible for next install
Following on from an auto deploy install using SD cards on a Cisco UCS where we couldnt configure the scratch partition within an automated process so I wrote a powershell script to loop around a specific cluster and update all the host logs.
Note: This assumes that the directories are already created. I might include this in version 2 of the script.
As a standard we set the logs to /vmfs/volumes/{DatastoreName}/hostlogs/{NameofESXiHost} eg /vmfs/volumes/datastore1/hostlogs/tstuk-esx01
The script has two variables:
ClusterName = The name of your Compute Cluster DatastoreName = Name of your vmfs datastore in uuid format
# Variables
$ClusterName = "MyCluster"
$DatastoreName = "My_UUID"

# Loop through each host and set scratch
foreach ($VMHost in ($Cluster | Get-VMHost ) ) {
    $Shortname = ($VMHost | Get-VMHostNetwork).HostName
    write-host Updating host: $Shortname
    $VMHost | Get-AdvancedSetting -Name "ScratchConfig.ConfiguredScratchLocation" | Set-AdvancedSetting -Value "/vmfs/volumes/$DatastoreName/hostlogs/$Shortname" -Confirm:$false

    }
In this example I will be putting an nginx reverse proxy in front of the three NSX-T Managers – as i am using multisite so cant use inbuilt VIP. I have built a Rocky Linux 8 machine with a minimal configuration.
NSX Managers will be on:
10.8.1.50 10.8.1.60 10.9.1.50
Install Nginx
dnf install nginx
Edit Nginx config and add include file
vi /etc/nginx/nginx.conf
Add
include /etc/nginx/passthrough.conf;
Ensure it is outside of the http block or you may get this message:
nginx: [emerg] “stream” directive is not allowed here in /etc/nginx/passthrough.conf:2 nginx: configuration file /etc/nginx/nginx.conf test failed
This quick guide explains how to install HAProxy with SSL passthrough on a Centos/Rocky 8 OS. This is specific to a NSX-T Manager install but can be used/tweaked for any environment
Install HA proxy
dnf install haproxy
Configure haproxy with front and back end servers
vi /etc/haproxy/haproxy.cfg
Add following entries
frontend nsxmgr_frontend
 bind *:443
 mode tcp
 option tcplog
 default_backend nsx_managers


backend nsx_managers
 mode tcp
 balance source
 server svr_nsx01 192.9.36.1:443 check
 server svr_nsx02 192.9.36.2:443 check
 server svr_nsx03 192.8.36.1:443 check
Note: I was able to use balance source in the options as all sources will come from different IPs. This became a particular issue when using round robin as sessions would try to hit another endpoint (nsx manager) and not be authenticated